Plank hardware mounting jig
One of the biggest hassles in finishing a DN is getting the plank mounting hardware in the right place (and the same place on multiple hulls and planks).
Last fall when I was moving the plank attachment from external to internal on my backup hull I decided I wanted to have all my gear interchangeable. The easiest way to do that was to make a jig that locates the holes for both the hull and plank hardware so they are correct relative to each other, and the same everywhere.
Luckily I have access to a milling machine with a digital readout. I started with a scrap of aluminum about 6" wide and 20" long and drilled holes for all the screws in the standard Sarns hull and plank hardware so that the plank-studs would be about 1/16" in from the outside edge of the oval hole in the hull-plate.
Alignment is aided by three elements of the jig:
- A pivot hole in the center.
- A machined reference edge at the front.
- Scribed lines through the center of the jig.
The process of installing hull-plates is fairly straightforward.
When I built the hull, I carefully marked the point at the center of the hull where I wanted the rear plank hole to be (just under 103" from the steering-runner pivot bolt). I drilled a small hole in the bottom skin there (5/64" seems to work well).
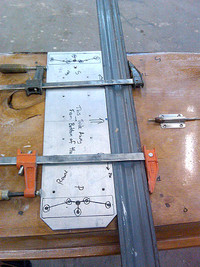 With the hull upside down, the first step is to tap a headless nail into the center-hole. The centered pivot-hole in the jig is placed over the nail. That locates the rear plank mounting holes exactly the desired distance from the front-runner.
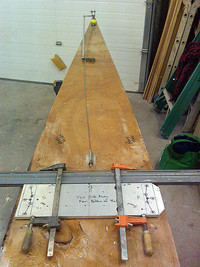 Next, I square the jig to the hull. A 6-foot straightedge is clamped across the reference-edge of the jig so that the center of the straightedge is exactly at the center of the jig (I carefully found the center of the straightedge and scribed a mark there).
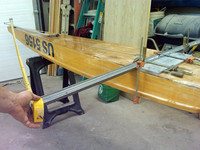 This gives you a long enough baseline to square the jig to the hull using the standard technique of measuring the distance from the ends of the straightedge to the steering chock.
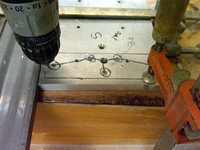 With the jig squared, I clamp it to the hull so it won't move while I'm drilling the holes for the hull-plates (for some reason I outlined the stud-plate screw-holes on this side of the jig and didn't indicate the hull-plate holes...).
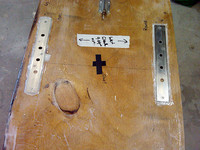 After drilling the holes, the clamps, jig, and pivot-nail are all removed and the hull-plates are screwed in place.
Note: this particular jig is too narrow to have holes for all the hull-plate screws, so once the plates are mounted using the center couple of screws, I have to go back and carefully drill the rest of the holes using the plate as a guide. Finally I add some thickened epoxy around the edges of the plates to take some of the shear-loads so the screws aren't stressed as much.
- GeoffS's blog
- Login or register to post comments
- 9451 reads
