GeoffS's blog
Summertime fast sailing...
July 14, 2015 - 20:12 — GeoffSWhat's an iceboater to do when the lakes melt?
You could get a foiling Moth or catamaran, but for a bunch less $$$ you can hit a local parking lot in a blokart like Jim Nordhaus (US-5566) and I did a few weeks ago:
Photos!
May 9, 2011 - 06:58 — GeoffSNot to be outdone by all the photos Graham Eriwin posted for the past season, my photo-blog will feature "Iceboat Week": for the next seven days there will be a new iceboat photo at: http://blog.moving-target-photos.com/
Ready to load into the trailer...
January 23, 2011 - 07:26 — GeoffSAlmost done...
January 22, 2011 - 09:35 — GeoffS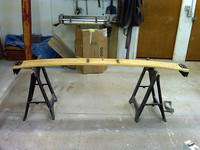 Well, today the everything came together for the first time. There were no parts (at least temporarily) left in the box from when I disassembled the boat after the crash.
- 2 comments
- Read more
- 4384 reads
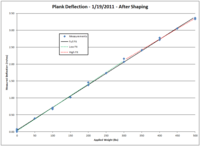
Post-shaping deflection measurements
January 20, 2011 - 08:40 — GeoffSThe plank is off the jig...
January 18, 2011 - 06:59 — GeoffS(actually, it's back on the jig to let the epoxy completely cure...)
I pulled all the clamps off, quickly cleaned off the excess epoxy, and eagerly checked the deflection. It looks pretty good, about 145 lbs/inch so it deflects just under 1 3/4 inches with me on it. I'm guessing it will stiffen up a bit as the glue gets to full cure, and rounding the edges will probably soften it, so it will probably end up very close to this value.
- 4 comments
- Read more
- 5652 reads
New plank glued up...
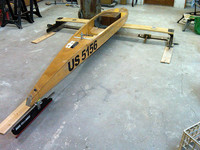
January 17, 2011 - 08:37 — GeoffSThe final (and most lengthy) part of the repairing my DN after the crash on Jan. 2nd was to build a new plank.
Blast from the past...
January 13, 2011 - 23:51 — GeoffSCheckout the Bronze fleet third-race results in the "This Day in Ice Boating History - January 13, 1992 Wisconsin State Journal" item on iceboat.org's home page - just twelve years later things were a little different...
- 1 comment
- 4346 reads
Plank hardware mounting jig
January 11, 2011 - 08:28 — GeoffSOne of the biggest hassles in finishing a DN is getting the plank mounting hardware in the right place (and the same place on multiple hulls and planks).
Last fall when I was moving the plank attachment from external to internal on my backup hull I decided I wanted to have all my gear interchangeable. The easiest way to do that was to make a jig that locates the holes for both the hull and plank hardware so they are correct relative to each other, and the same everywhere.
Jan 10th - Hull is ready to go!
January 11, 2011 - 08:15 — GeoffSAfter a week of working evenings my hull is back ready to go sailing.
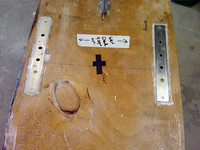 All the sanding is done and the hull-plates are screwed down again. I edged the hull-plates with thickened epoxy to take some of the shear-load off the screws. I'd done this before and it seemed to work well in the de-planking, as the plates were able to pull away from the hull (relatively) cleanly during the crash.
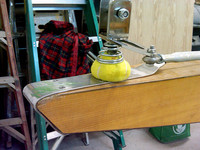 While I was working on the hull I augmented the bow-spring with a tennis ball and glued the tiller-head to the tiller-post.
Jan. 6th - last bit of gluing on the hull...
January 7, 2011 - 06:52 — GeoffSTonight was relatively quick. Some sanding of the lumps and drips from last night's work, then flip the boat upright and work on the cockpit-floor side of the hole punched through the bottom. A little work with the grinder/DA on the edges, then cutting and feathering the edges of the patch, and it was ready to glue.
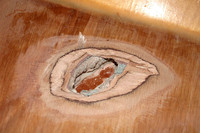 You can't see through the floor anymore!
The edges of the hole are faired out and ready for the patch.
Jan. 5th - Almost done with the bottom...
January 6, 2011 - 19:07 — GeoffSWith the clamps and weights removed all the patches looked good. After some "quality time" making dust with the dual-action sander everything was smooth and (mostly) level. The next step was to mix up some epoxy
Jan. 4, 2011 - repairs start...
January 5, 2011 - 21:08 — GeoffSUpdate: Check my blog here for more progress reports.
Tuesday is the regular "Boat Night" at the Nordhaus Boatwerks, so I had plenty of company (and help) with repairs.
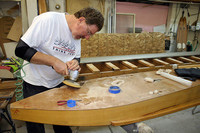 I decided to start attacking the holes and gouges in the bottom. The first step was to feather out all the edges and make plugs for the access holes through the cockpit floor so I could fill in all the damage around them.
- 2 comments
- Read more
- 4471 reads
Jan. 2, 2011 - US-5156 Meets Crack - Crack Wins...
January 4, 2011 - 21:26 — GeoffSUpdate: The next installment in the saga: Repairs Begin...
In the first outing of 2011 a large crack opened up during the first DN race. I hit it on my last downwind leg. I don't really remember much other than seeing a small bump on the ice ahead of me, then a "bang!", and the next thing I was sliding down the ice backwards (still in the cockpit) with my plank sitting on my chest. I was logging the race with my phone's GPS, so you can check out the track.
I think my photos are improving...
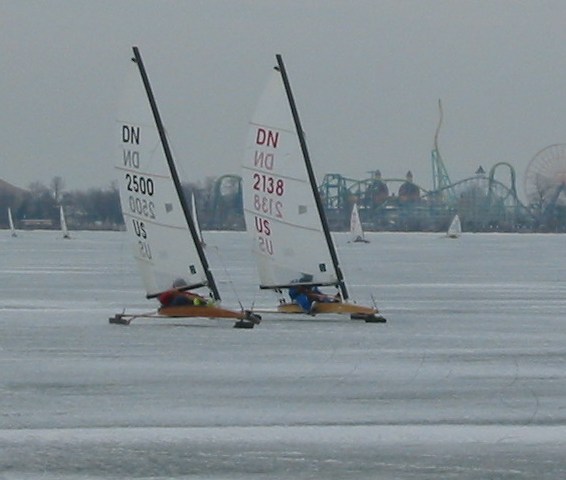
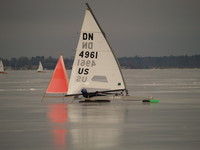
February 2, 2010 - 02:32 — GeoffSI just looked back at the first photo I posted here, compared with the shots from Fire on Ice last weekend...
- 4 comments
- 5350 reads
